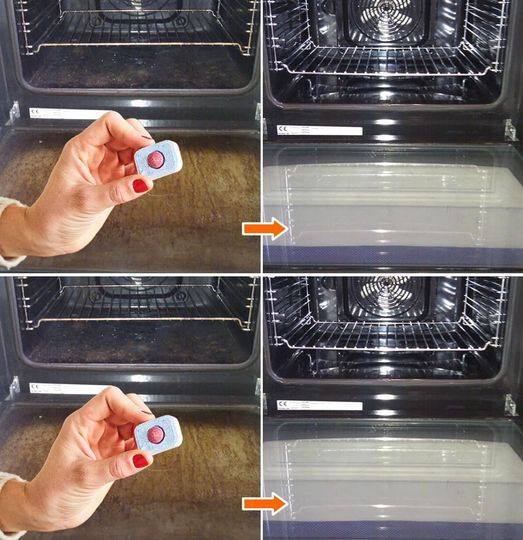
Cleaning the oven is a chore that few relish, yet it is a crucial part of maintaining a clean kitchen and ensuring that meals are prepared in a healthy environment. While there are many types of ovens and cleaning methods available, one key principle remains constant: safety first. In this article, we’ll explore essential safety precautions, the reasons behind cleaning your oven, and a step-by-step guide to accomplish the task effectively.
Understanding the Necessity of Oven Cleaning
Before we delve into the cleaning process, it’s imperative to understand why oven cleaning is essential. First and foremost, a clean oven enhances the flavor of your food. Residual grease, food particles, and burnt remains from past cooking can impart unwanted flavors to your current recipes. Unclean ovens can also pose health risks, as accumulated grease can ignite and cause kitchen fires.
Moreover, a clean oven operates more efficiently. A buildup of grime can obstruct heat circulation, making your oven work harder and consume more energy. Regular cleaning can prevent these issues, ensuring that your oven lasts longer and performs better.
Step 1: Safety First
Cool Down Assessment
You should never attempt to clean your oven while it is still warm. A hot surface can burn your skin or cause the cleaning agents to evaporate quickly, releasing harmful fumes. Always allow your oven to cool completely before initiating the cleaning process. It is advisable to wait for at least an hour after cooking to ensure safety.
Wearing Protective Gear
To protect your skin and respiratory system from harsh cleaning agents, wearing gloves is crucial. Choose gloves made of durable materials that will withstand strong chemical cleaners, or opt for natural alternatives such as baking soda and vinegar. If your cleaning products contain strong fumes, consider wearing a mask or working in a well-ventilated space.
Step 2: Gather Your Cleaning Supplies
Before you start cleaning, gather the necessary supplies:
- Gloves: As previously mentioned, they will protect your hands.
- Cleaning Solutions: Choose between commercial cleaning agents specifically designed for ovens or create natural alternatives:
- Baking soda and water: A fantastic natural degreaser.
- White vinegar: Great for breaking down stubborn stains and odors.
- Dish soap: Effective in cutting through greases.
- Scrubbing Tools: A sponge, brush, or scrubbing pad. Avoid metal tools that could scratch surfaces.
- Microfiber Cloths or Paper Towels: For wiping down surfaces and drying.
- Bucket or Bowl: For mixing your cleaning solution.
- Scraper: A plastic scraper is useful for lifting off tough, stuck-on residues without scratching the surface.
Step 3: Preparing Your Oven
Remove the Racks
Begin the cleaning process by removing the oven racks. This allows you to access all areas of the oven easily, and it is often more efficient to clean them separately. You can soak the racks in warm, soapy water in your sink while you clean the oven.
Clear the Interior
Next, take out any aluminum foil, pans, or any other items inside the oven. This prepares the space for a thorough cleaning and helps prevent any unwanted burn during the cleaning process.
Step 4: Creating the Cleaning Solution
If you choose to go the natural route, combine baking soda and water to create a paste. A common ratio is about 1 cup of baking soda to 1/4 cup of water, but you can adjust this based on your cleaning needs. The paste should have a spreadable consistency. For tough grime, you may also add vinegar to enhance cleaning power.
If you opt for commercial cleaners, read the instructions carefully. Many come with specific application methods that maximize their effectiveness.
Step 5: Applying the Cleaning Solution
The Baking Soda Paste Approach
- Spread the Paste: Use a sponge or your gloved hands to apply the baking soda paste generously over the interior surfaces of the oven, avoiding the heating elements.
- Let it Sit: Allow the paste to work its magic for a minimum of 15-30 minutes, or even overnight for tougher stains. The longer it sits, the easier it will be to remove the grime.
Commercial Cleaners
If you’re using a commercial cleaner, apply it following the manufacturer’s instructions. Most require you to spray and let it sit for a specified duration.
Cleaning the Racks
While the oven cleaner is doing its job, clean the racks. Use the soapy water you’ve prepared. Scrub them with a sponge or brush, focusing on stubborn areas. Rinse them thoroughly and allow them to dry.
Step 6: Scrubbing and Wiping Down
After the paste or cleaner has had time to rest, it’s time to scrub. Use a damp sponge or cloth to wipe away the cleaner. For stubborn areas, a plastic scraper can help lift off grime without damaging the oven’s interior.
Rinse Thoroughly
Once you’ve removed the primary stain, get a fresh cloth and dampen it with clean water to rinse. It’s crucial to ensure that all cleaning residues are removed, as they can produce smoke or fumes when the oven is used again.
Step 7: Final Touches
Clean the Oven Door
With the oven’s interior clean, don’t forget about the door. Grease and stains can accumulate here as well. The same baking soda paste can be applied to the door, or you can use a glass cleaner for a streak-free finish.
Reassemble the Oven
Once everything is clean and dry, replace the oven racks appropriately. Make sure to check that your oven is functioning correctly before using it again.
Step 8: Preventative Measures
To keep your oven clean longer, it’s essential to establish a regular cleaning schedule. Aim to perform a deep clean every few months, but in the meantime, keep a watchful eye on spills and messes. Wiping the interior surfaces after each use can prevent heavy build-up. Consider using a drip pan for particularly messy dishes.
Using parchment paper or baking mats can also minimize spills and facilitate easier cleanup. When you notice spills occurring, let them cool and clean up promptly, reducing the amount of work needed during your next deep clean.
Conclusion
Cleaning your oven doesn’t have to be a dreaded task filled with unsafe practices or harsh chemicals. Following the steps outlined above ensures a clean and safe environment for cooking, protecting your health and enhancing your culinary experience. Always remember that safety comes first; wait for the oven to cool down, wear gloves, and ventilate your working space appropriately. With a little consistent effort, you’ll maintain an oven that’s not just sparkling clean but also functional and efficient. When cleaned appropriately, your oven will reward you with better cooking experiences, delicious meals, and a safer kitchen environment. Happy cleaning!


