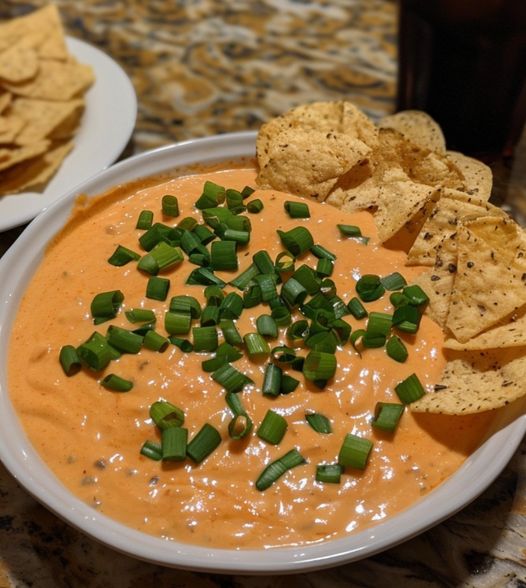
Are you ready to spice up your snack game with a dish that’s creamy, cheesy, and completely dairy-free? Look no further than this vegan queso recipe that will satisfy your craving without compromising on flavor. Perfect for tortilla chips, as a topping for tacos, or drizzled over nachos, this vegan queso is not only easy to make but also packed with nutritious ingredients.
Understanding Vegan Queso
Traditional queso is typically made from cheese, cream, and various seasonings. But for those who follow a vegan diet or anyone looking to cut back on dairy, the challenge is to achieve that rich, creamy texture and savory taste without animal products. The good news is that there are plenty of clever substitutes available that can help you create a delicious vegan queso that rivals its dairy-filled counterpart.
Ingredients You’ll Need
To make the perfect vegan queso, gather the following ingredients. This recipe not only prioritizes flavor but also utilizes whole-food ingredients to keep it nutritious.
Base Ingredients:
- 1 cup raw cashews (soaked for at least 4 hours)
- 1 cup unsweetened plant-based milk (almond, soy, oat, or cashew milk are great options)
- ½ cup nutritional yeast (provides a cheesy flavor)
- 1 tablespoon lemon juice (adds brightness)
- 1 teaspoon apple cider vinegar (enhances tanginess)
- 1 teaspoon onion powder
- 1 teaspoon garlic powder
- ½ teaspoon smoked paprika (for a touch of smokiness)
Flavor Boosters:
- 1 jalapeño pepper (fresh or pickled, adjust based on spice preference)
- 1 small tomato (diced)
- Salt to taste
- Fresh cilantro for garnish (optional)
Step-by-Step Instructions
Now that you have your ingredients ready, it’s time to create this luscious vegan queso. Follow these simple steps:
Step 1: Soak the Cashews
If you haven’t already done so, soak the raw cashews in water for at least 4 hours. This softens them, making them easier to blend into a creamy sauce. If you’re short on time, you can boil the cashews for about 10 minutes, which will achieve a similar texture.
Step 2: Drain and Rinse
Once soaked, drain the cashews and rinse them under cold water. This removes any residue and ensures your queso tastes fresh and clean.
Step 3: Blend the Base
In a high-speed blender, add the drained cashews, plant-based milk, nutritional yeast, lemon juice, apple cider vinegar, onion powder, garlic powder, and smoked paprika. Blend until the mixture is smooth and creamy. Scrape down the sides as necessary to ensure everything is well combined. If the mixture is too thick, add a bit more plant-based milk until you achieve your desired consistency.
Step 4: Add Heat and Flavor
Chop your jalapeño pepper and add it to the blender along with the diced tomato. Blend again until everything is well incorporated, but don’t completely purée if you prefer a bit of texture. Taste the mixture and add salt to your liking.
Step 5: Heat It Up
Pour your blended queso into a saucepan and heat it over medium-low heat. Stir continuously to prevent sticking and ensure even heating. This step helps to meld the flavors together and thickens the mixture a bit. Continue to heat for about 5-10 minutes until warmed through.
Step 6: Serve and Enjoy!
Once heated, transfer the queso to a serving bowl. Garnish with fresh cilantro if desired. Serve with tortilla chips, fresh veggies, or use it as a topping for nachos, tacos, or baked potatoes. The possibilities are endless!
Tips for the Best Vegan Queso
- Customize Your Spices: Feel free to adjust the spices based on your flavor preferences. Adding chili powder, cumin, or even a dash of cayenne pepper can ramp up the flavor and heat.
- Make It Smoky: If you love that smoky flavor, try adding some liquid smoke or using chipotle powder for a deeper taste.
- Add Some Creaminess: For an even creamier texture, consider adding 1 tablespoon of tahini or a small amount of coconut cream. This will enhance the mouthfeel and richness of the queso.
- Experiment with Toppings: Get creative! Top your queso with freshly diced avocado, olives, or even a sprinkle of crushed tortilla chips for added crunch.
- Storage: Leftover vegan queso can be stored in an airtight container in the fridge for up to a week. Reheat gently on the stove, adding a splash of plant-based milk to restore its creamy texture.
Nutritional Benefits of Vegan Queso
While traditional queso is often high in saturated fats and cholesterol, this vegan version not only tastes great but is also friendlier on your health. Here are a few nutritional highlights:
- Cashews: These nuts are a great source of healthy fats, protein, vitamins E and K, and minerals such as magnesium and zinc.
- Nutritional Yeast: This is a powerhouse of nutrients, rich in B vitamins, particularly B12 (when fortified), making it an excellent addition for anyone on a plant-based diet.
- Plant-Based Milk: Choosing unsweetened varieties avoids added sugars and unnecessary calories while still offering a good source of calcium and vitamins, depending on the type you choose.
Pairing Suggestions
The beauty of this vegan queso is its versatility. Here are a few pairing suggestions to elevate your dining experience:
- With Chips: Classic corn tortilla chips are always a hit. You can even make your own by cutting tortillas into triangles and baking them until crispy.
- As a Dip: Serve this queso as a dip alongside a platter of fresh vegetables like carrots, celery, and bell peppers for a vibrant appetizer.
- In Recipes: Incorporate this queso into other dishes, such as enchiladas, burritos, or even drizzle it over baked vegetables.
Conclusion
Making your own vegan queso at home is not only easy and delicious, but it also allows you to control the ingredients and customize the flavors to your liking. Whether you’re entertaining guests or simply satisfying a late-night snack craving, this vegan queso recipe is sure to impress. It’s creamy, indulgent, and bursting with flavor—a true game-changer in the world of plant-based dishes.
So grab your ingredients, fire up that blender, and enjoy a comfort food favorite that’s both cruelty-free and full of wholesome goodness! With just a few easy steps and a handful of ingredients, you can create a dish that leaves everyone asking for more. Happy cooking!


