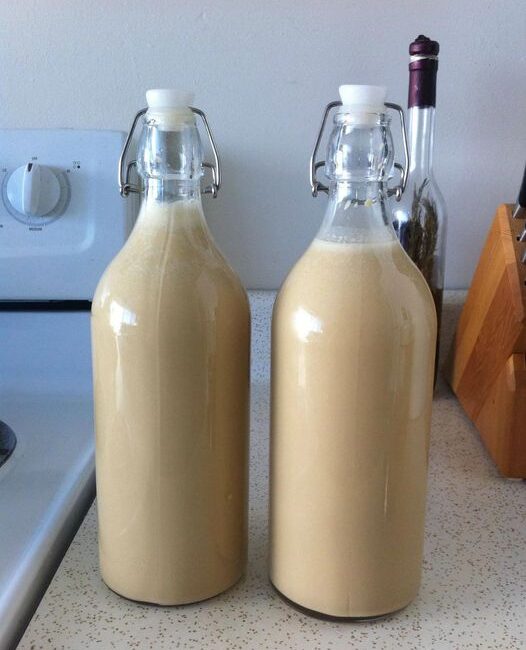
Condensed milk is a staple ingredient in many desserts, providing a rich, sweet base for everything from pies to coffee. However, for those who follow a vegan diet or are lactose intolerant, traditional condensed milk can be off-limits. Fortunately, making your own vegan condensed milk at home is incredibly simple and requires only a few ingredients. In this article, we’ll explore the benefits of vegan condensed milk, provide a step-by-step recipe, and suggest ways to use it in your favorite dishes.
What is Condensed Milk?
Condensed milk is cow’s milk from which water has been removed, and it is typically sweetened. The result is a thick, creamy liquid that’s both sweet and versatile. It’s commonly used in desserts, coffee, and a variety of baked goods. The vegan version replicates this texture and sweetness without any animal products, making it suitable for a plant-based diet.
Benefits of Vegan Condensed Milk
- Dairy-Free: The most significant advantage of vegan condensed milk is that it allows those who are lactose intolerant or vegan to enjoy rich desserts without the discomfort associated with dairy.
- Customizable: You can adjust the sweetness and flavor to suit your taste. Use different types of plant-based milk or sweeteners to create your perfect version.
- Healthier Option: Homemade vegan condensed milk can be made with wholesome ingredients, allowing you to control the sugar content and avoid preservatives found in store-bought versions.
- Versatile: This ingredient can be used in various recipes, from coffee sweeteners to creamy desserts, making it a valuable addition to any kitchen.
Ingredients
To make vegan condensed milk, you’ll need the following ingredients:
- 1 cup of plant-based milk: Almond, coconut, soy, or oat milk all work well. Coconut milk is particularly creamy and lends a rich flavor.
- 1/2 cup of granulated sugar: You can use coconut sugar, maple syrup, or agave syrup for a different flavor profile.
- 1 tablespoon of cornstarch or arrowroot powder: This helps thicken the mixture.
- 1 teaspoon of vanilla extract: For flavor.
- Pinch of salt: To balance the sweetness.
Optional Additions
- Flavoring: Add spices like cinnamon or nutmeg for warmth or espresso powder for a coffee-flavored condensed milk.
- Nut Butters: Incorporating a spoonful of almond or peanut butter can enhance the flavor and create a creamier texture.
Step-by-Step Recipe for Vegan Condensed Milk
Step 1: Gather Your Ingredients
Before you start, gather all your ingredients and kitchen tools. You’ll need a medium saucepan, a whisk, measuring cups, and a storage container for the finished product.
Step 2: Combine Ingredients in a Saucepan
- In the Saucepan: Add the plant-based milk, granulated sugar, and a pinch of salt to a medium saucepan. Whisk the ingredients together until the sugar is fully dissolved.
- Add Cornstarch: In a small bowl, mix the cornstarch with a couple of tablespoons of the milk mixture until smooth. This prevents lumps when you add it to the saucepan.
Step 3: Heat the Mixture
- Heat on Medium: Place the saucepan over medium heat. Continuously whisk the mixture to prevent it from sticking to the bottom of the pan.
- Bring to a Simmer: As the mixture heats, it will begin to simmer. Continue whisking to keep everything combined.
Step 4: Thicken the Mixture
- Add the Cornstarch Mixture: Once the milk is simmering, add the cornstarch mixture to the saucepan while whisking continuously.
- Thicken: Continue to cook for about 5-10 minutes, or until the mixture thickens to your desired consistency. It should be noticeably thicker but still pourable. Remember that it will thicken further as it cools.
Step 5: Add Flavoring
- Vanilla Extract: Once thickened, remove the saucepan from heat and stir in the vanilla extract for flavor.
- Taste and Adjust: Taste your condensed milk. If you’d like it sweeter, feel free to add a bit more sugar or sweetener, whisking until fully dissolved.
Step 6: Cool and Store
- Transfer to Container: Pour the vegan condensed milk into a clean glass jar or container.
- Cool Completely: Let it cool to room temperature before sealing the container. This will help it thicken further.
- Refrigerate: Store the condensed milk in the refrigerator for up to two weeks. You can also freeze it for longer storage; just thaw it in the fridge before using.
Using Vegan Condensed Milk
Now that you have a jar of delicious vegan condensed milk, let’s explore some fantastic ways to use it!
1. In Coffee and Tea
Use your vegan condensed milk as a creamy sweetener in coffee or tea. Just a tablespoon or two can transform your morning beverage into a delightful treat.
2. In Desserts
- Pies and Tarts: Use it as a filling for vegan pies and tarts. It pairs beautifully with fruit, chocolate, or nuts.
- Pudding: Whip it into a pudding mixture for a rich, creamy dessert. Simply combine it with cornstarch or agar-agar and heat until thickened.
- Ice Cream: Blend it with your favorite fruits and freeze for a delicious vegan ice cream.
3. Baking
- Cakes and Muffins: Replace some of the liquid in your cake or muffin recipes with vegan condensed milk for added richness and sweetness.
- Brownies: Incorporate it into brownie batter for an ultra-moist texture.
4. Sauces and Dips
Use vegan condensed milk to create creamy sauces or dips. Combine it with cocoa powder and a little nut butter for a delicious chocolate sauce, or mix it with herbs and spices for a creamy salad dressing.
5. Vegan Fudge
Combine vegan condensed milk with dairy-free chocolate chips and nuts to make an easy fudge. Simply melt the chocolate, mix in the condensed milk, pour it into a pan, and let it set in the fridge.
Tips for Perfect Vegan Condensed Milk
- Choose the Right Milk: The creaminess of your vegan condensed milk will depend significantly on the plant-based milk you choose. Coconut milk or a combination of milks often yields the best results.
- Sweetness Level: Adjust the sweetness according to your taste preference. If you prefer less sugar, you can experiment with natural sweeteners like dates or maple syrup.
- Texture Matters: If you want a thicker result, increase the amount of cornstarch slightly, but be careful not to add too much, as it can alter the flavor and mouthfeel.
- Use Fresh Ingredients: Ensure your ingredients are fresh for the best flavor and texture. Old or stale ingredients can affect the final product.
- Keep It Fresh: Store your vegan condensed milk in an airtight container in the refrigerator. If you notice any separation, give it a good shake or stir before using.
Conclusion
Vegan condensed milk is a versatile and delicious ingredient that opens up a world of possibilities in plant-based cooking and baking. With its creamy texture and sweet flavor, it can enhance various dishes, from beverages to desserts.
By making your own at home, you can control the ingredients and customize it to your liking. Whether you’re drizzling it over pancakes, mixing it into coffee, or using it in your favorite dessert recipes, vegan condensed milk is sure to impress.
So, why not give this simple recipe a try? With just a few ingredients and minimal effort, you’ll have a rich, dairy-free alternative that’s perfect for all your culinary creations! Enjoy your homemade vegan condensed milk and let your imagination run wild in the kitchen!


