The Pruning Process: A Step-by-Step Guide
Now that you understand the “why” and “when” of rose pruning, let’s dive into the “how.” Here’s a step-by-step guide to ensure you prune your roses with confidence:
- Gather Your Tools: Equip yourself with sharp pruning shears, bypass pruners for thicker canes and anvil pruners for dead or diseased wood. Additionally, consider having gloves and a bucket on hand for collecting debris.
- Start with a Clean Slate: Remove any remaining leaves from the previous season. This allows for a better view of the rose bush’s structure and facilitates easier identification of pruning targets.
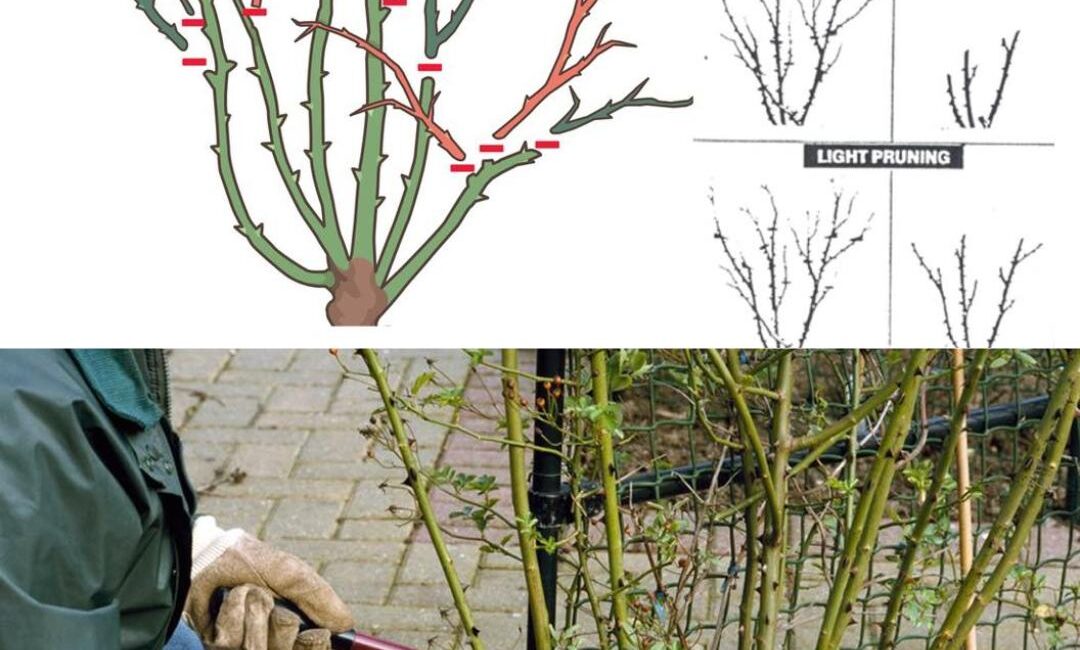
- Clear Out the Deadwood: Begin by removing all dead, diseased, or damaged canes. Cut them back to their point of origin where they meet a healthy main stem.
- Thin the Crowd: Identify and remove spindly, weak canes that contribute little to flower production. This allows for better air circulation and redirects energy to more productive areas of the plant.
- Tackle Crossing Canes: Canes that rub against each other can damage the bark and create entry points for disease. Remove one of the offending canes to create space.
- Shape for Success: Shorten remaining healthy canes by one-third to one-half their length. Make your cuts at a 45-degree angle, just above a healthy outward-facing bud. This encourages new growth to branch outwards, creating a more open and airy rose bush.
- Seal the Deal (Optional): For thicker cuts, especially in colder climates, consider applying a sealant like white glue to prevent moisture loss and disease entry.
Remember: Throughout the growing season, you can practice “deadheading,” which involves removing spent blooms just below the base of the flower head. This encourages continuous blooming throughout the summer.
Pages: 1 2