Conserving water is an admirable goal, and what better way to achieve it than by harnessing the power of rainwater? Building your own rain barrel is a simple and rewarding project that translates to a greener thumb and a lighter water bill. Here’s a comprehensive guide to transform you into a rain barrel-building extraordinaire:
Gather Your Supplies:
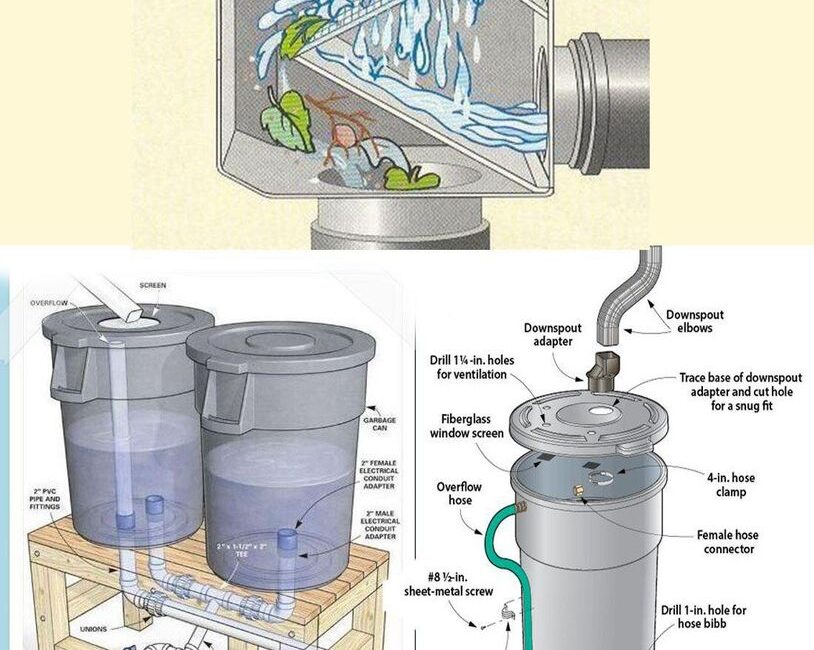
- The Barrel: Upcycled food-grade plastic barrels (around 55 gallons) are a popular choice. Ensure the lid has a removable top or can be easily modified to accommodate a spigot.
- Spigot: Choose a spigot with a shut-off valve for easy water access. Opt for a brass spigot for durability.
- Mesh Screen: A fine mesh screen will prevent leaves and debris from entering the barrel.
- Overflow Valve (Optional): This prevents the barrel from overflowing during heavy rain. It usually consists of a hose attached to a fitting on the side of the barrel that diverts excess water away from your foundation.
- Drill and Drill Bits: You’ll need drill bits that can handle the plastic of your chosen barrel.
- Utility Knife: Useful for making precise cuts in the barrel lid.
- Silicone Sealant: Ensures watertight connections around the spigot and overflow valve (if used).
- Duct Tape (Optional): For additional reinforcement around fittings, especially if using a repurposed barrel.
- Sandpaper (Optional): To smooth any rough edges on cut surfaces.
Step-by-Step Rain Barrel Building:
Read more on page 2
Pages: 1 2